Sun Catcher Butterfly Wings
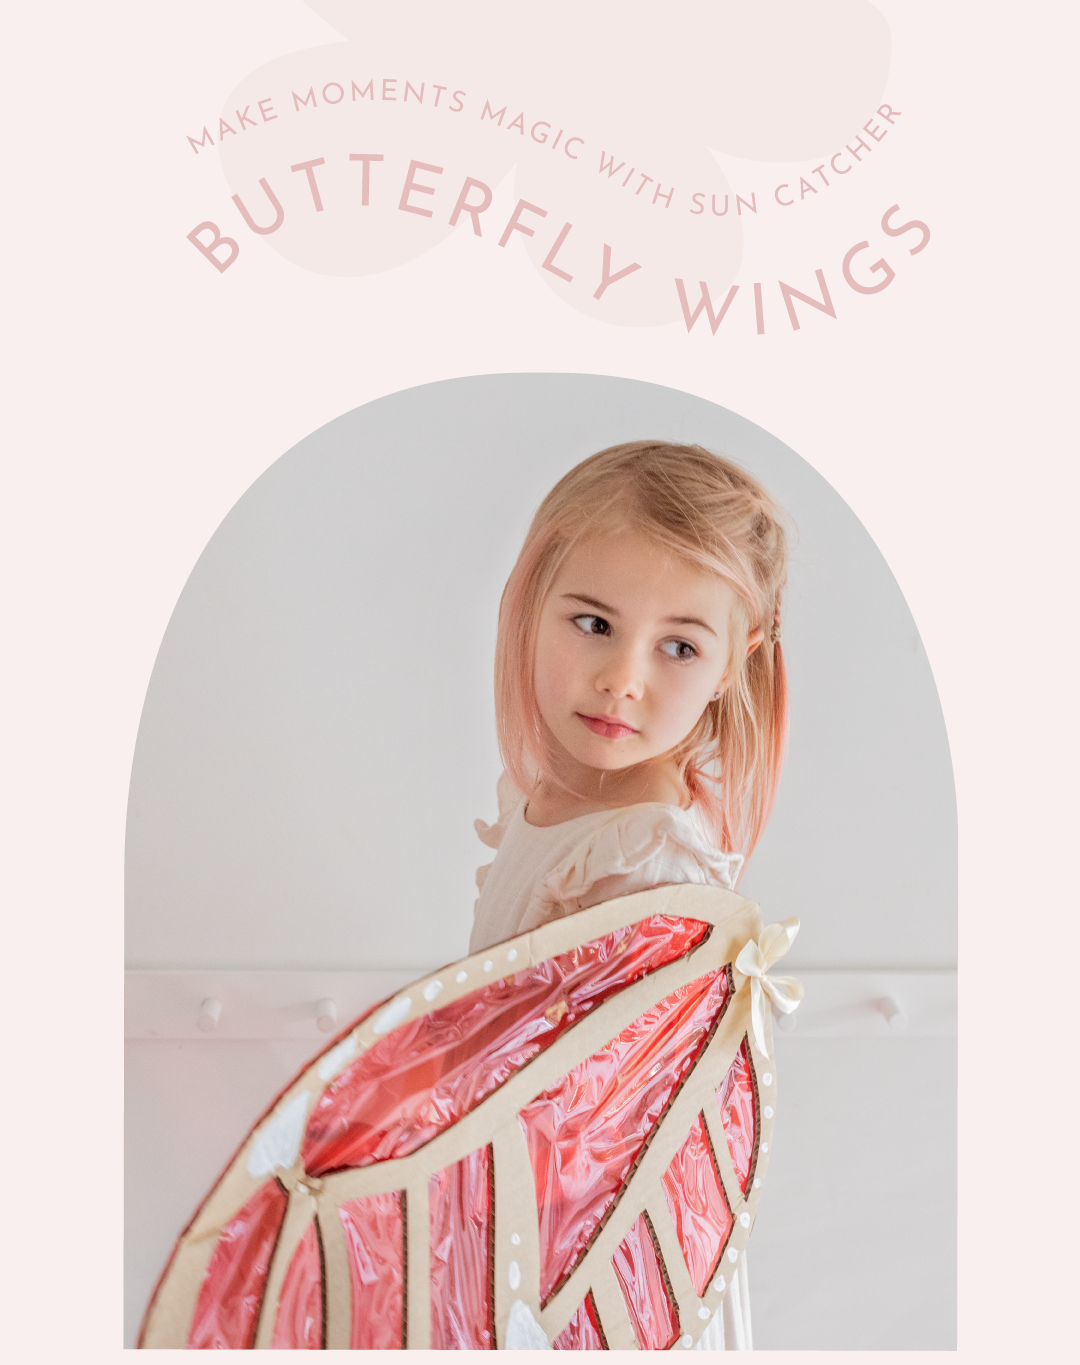
The amazingly talented Jess from @uponameadow shares with us how she created these beautiful sun catcher butterfly wings for her girls. The perfect craft that you can use over and over again.
What will you need:
Thick cardboard (you can repurpose old boxes or purchase packing boxes from Warehouse stationary)
Sharp cutting knife
Cutting board
Glue
Paint
Felt pen (one that is close in colour to the cardboard is best)
Cellophane
Ribbon
Sharp cutting knife
Cutting board
Glue
Paint
Felt pen (one that is close in colour to the cardboard is best)
Cellophane
Ribbon
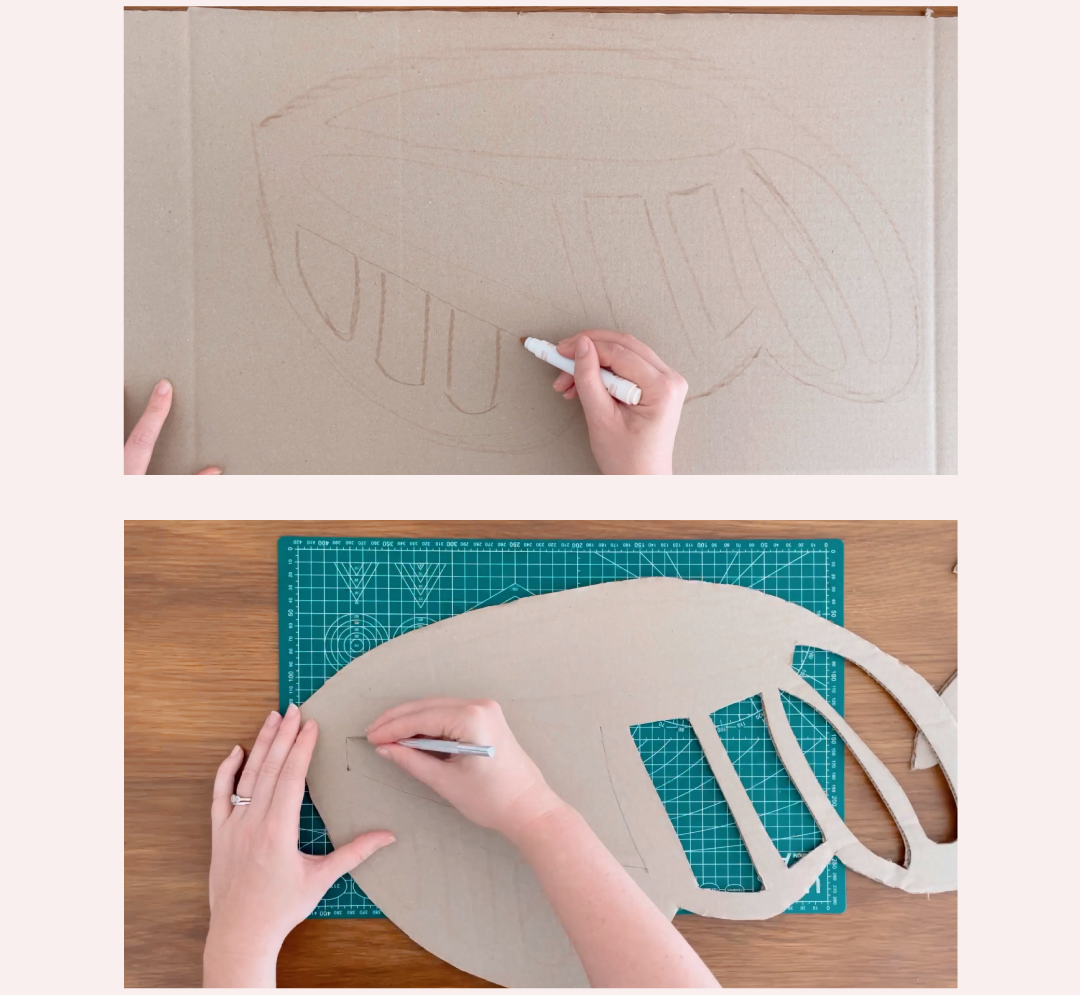
STEP ONE: Design The Wings
Take a piece of thick cardboard and draw the shape of a butterfly wing using a felt pen (the wing needs to be roughly the length of the child's arm). There is no wrong way of designing a wing, my kids love experimenting with different shapes and patterns. Make sure you add enough shapes inside the wings so that the light will be able to shine through once cut out. I have included a template of the wings featured here, print them out as a reference if needed.
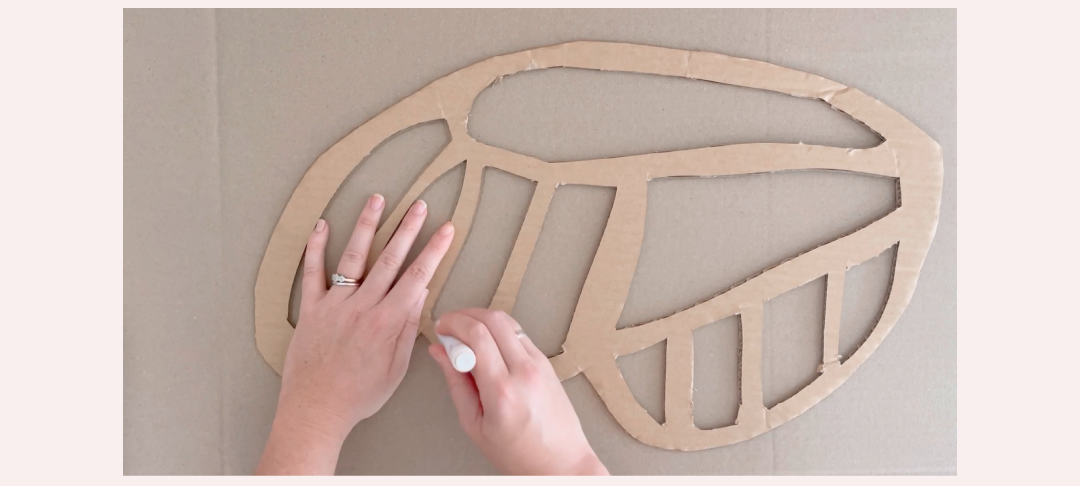
STEP TWO: Cut Out The Wings
Using a cutting knife, carefully cut along the outline of the wings. Make sure to do this on a safe cutting surface like a cutting mat or a thick piece of cardboard.
Take your time and make precise cuts to ensure clean edges for your wings. Then cut out the shapes or patterns inside the wing.
Use your cut wing as a template and trace a second wing, making sure it is a mirror image of the first. Cut out the second wing.
Take your time and make precise cuts to ensure clean edges for your wings. Then cut out the shapes or patterns inside the wing.
Use your cut wing as a template and trace a second wing, making sure it is a mirror image of the first. Cut out the second wing.
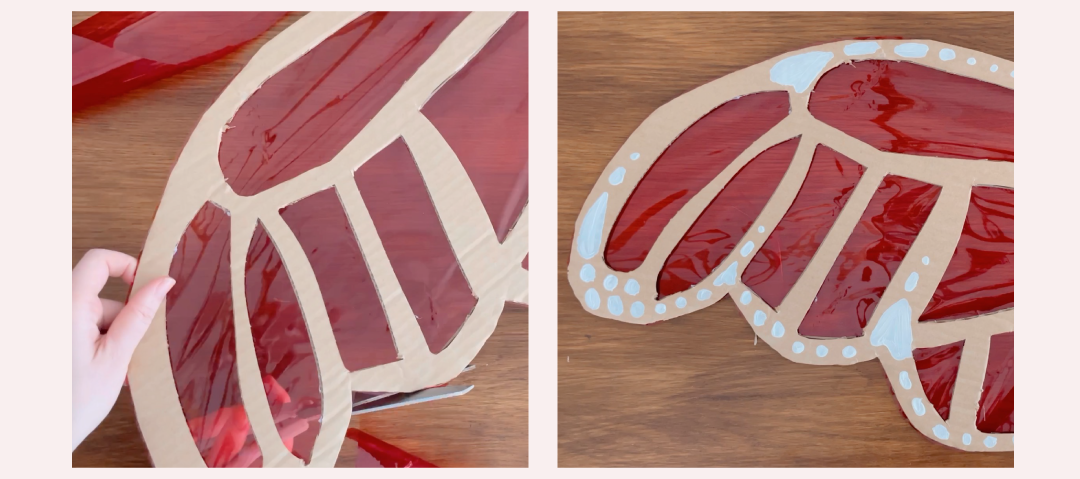
STEP THREE: Create The Sun Catcher Effect
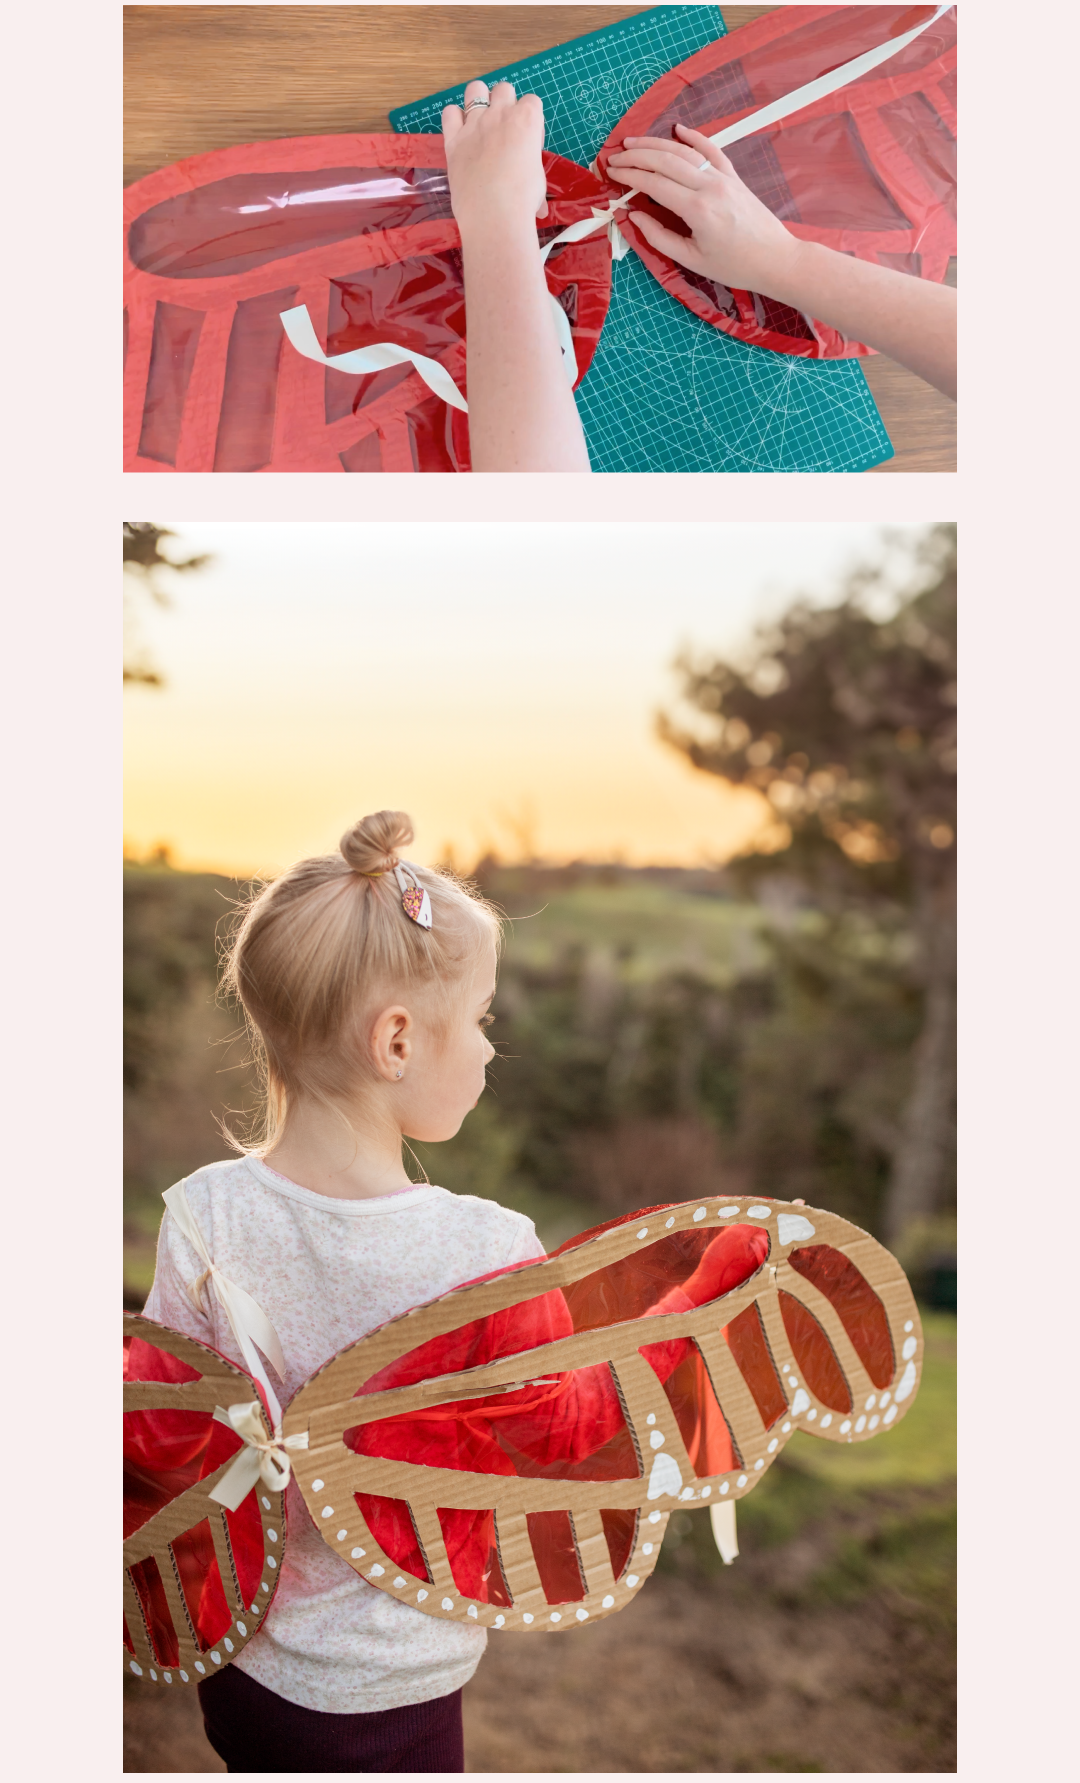
Use cellophane to fill in the cut out inner shapes. Apply glue over the wing frame and carefully stick a cellophane sheet over, covering the back side of the wings. (You can experiment with different colour cellophanes, either by overlaying them or having a different colour for each window.)
Let the glue dry completely & cut off the excess cellophane.
Use paint to add some details.
Let the glue dry completely & cut off the excess cellophane.
Use paint to add some details.
STEP FOUR: Attach Ribbon Straps
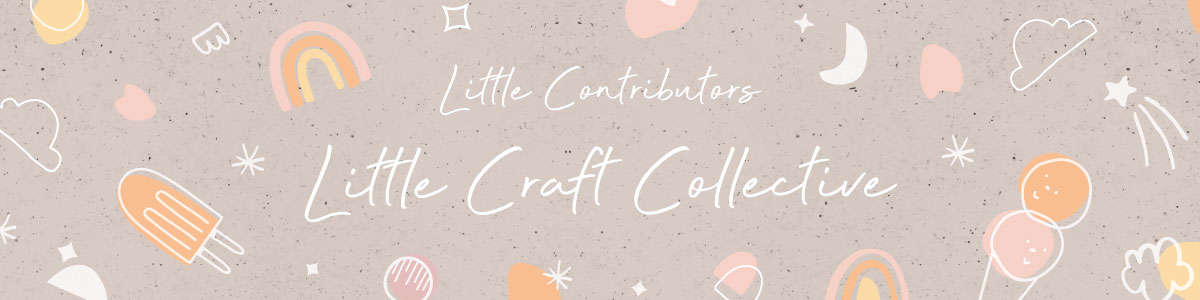
Place the wings together and cut a hole through both wings so you can thread a ribbon throw and tie them together. The wings should be able to pivot up and down.
On the back of the wings thread a ribbon through and loop both ends. These loops will become the shoulder straps. Measure and cut two pieces of ribbon that will be used as straps to hold the wings to the child's arms.
Put the wings on the child's back using the shoulder straps. Attach a ribbon to the end of the left wing where their wrist sits by using glue or by punching small holes and threading the ribbon through.
Repeat the process for the right wing so the wings are secure. The wings should be able to pivot up and down as the child lifts and drops their arms.
Now you have a pair of beautiful butterfly wings made out of cardboard! Perfect for imaginative play, costume parties, or any other occasion that calls for some magical fluttering. These are so fun outdoors, they make stunning, colourful shadows.
This beautiful craft is bought to us by Jess who is a clever Mama of two little girls, Amelie & Bonnie. She is always coming up with the sweetest crafts and activities for her little girls to do. You can follow her on Instagram over at @uponamedow
Leave a comment
This site is protected by hCaptcha and the hCaptcha Privacy Policy and Terms of Service apply.